(a glitch) Tag: Visual edit |
(→Racing) Tags: Visual edit apiedit |
||
| Line 21: | Line 21: | ||
[[File:CONFUSION2.jpg|thumb|...Another part of it.]]<span style="font-size:18px;">Strategies</span> |
[[File:CONFUSION2.jpg|thumb|...Another part of it.]]<span style="font-size:18px;">Strategies</span> |
||
===Racing=== |
===Racing=== |
||
| − | *[[Radical One]] is your best bet. Not only does |
+ | *[[Radical One]] is your best bet. Not only does he have excellent moves and good air, he's fast. [[Formula 7]] can finish the stage faster, with more of a risk to get wasted. |
*Use the ramps to your advantage, as the AI will sometimes '''go over them '''in an attempt to hit you. In other words, use the [[Ramp Getaway]] strategy. |
*Use the ramps to your advantage, as the AI will sometimes '''go over them '''in an attempt to hit you. In other words, use the [[Ramp Getaway]] strategy. |
||
===Wasting=== |
===Wasting=== |
||
Revision as of 23:20, 6 April 2015
| Confusion In An Illusion | |
|---|---|
|
Appears in |
Stage 10(NFM1) |
|
Boss Car |
|
|
Number of Laps |
2 |
|
Main feature |
Large Stage, Guidance arrow disabled |
|
Soundtrack |
|
|
Number of Checkpoints |
16 |
|
Recommended Strategy |
Race |
|
AI Behavior |
Very Aggressive |
|
Preceded by |
|
|
Followed by |
|
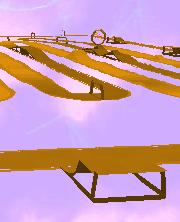
A part of it...
Confusion In An Illusion is the second-to-last stage (Stage 10) in the first Need for Madness. A veritable maze, this stage is made even more difficult by the lack of a guide arrow. Both racing and wasting are possible on this track. Beating this stage will unlock DR Monstaa and The Mad Party.
The Basics
The hardest stage in the first installment, you will have a fairly difficult time staying on track, and an equally difficult one trying to waste DR Monstaa, as the M A S H E E N isn't from the NFM 1 series, so, even EL KING can't waste DR Monstaa (only when he's full of power) and though this is a Confusion Stage (no guidance arrow) it's too hard to find someone to waste,and too hard to race on it, sometimes, DR Monstaa will attempt to push you off the track and you can forget where is the next checkpoint.
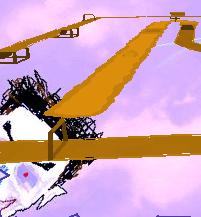
...Another part of it.
Strategies
Racing
- Radical One is your best bet. Not only does he have excellent moves and good air, he's fast. Formula 7 can finish the stage faster, with more of a risk to get wasted.
- Use the ramps to your advantage, as the AI will sometimes go over them in an attempt to hit you. In other words, use the Ramp Getaway strategy.
Wasting
- As there is no other available waster, use EL KING.
- Try to target DR Monstaa first. Camp out at the fixing hoop.
- As the AI never forgets the track, make sure YOU also remember the track. Intercept them and perform stunts when neccesary. Like in When In Danger, Just Chill Out, Radical One is not easy to waste because s/he can send you flying! Also, his/her AI is very strategic and is very careful to hit you.
Trivia
- If you use EL KING and you haven't completed this stage, it is possible to have 2 Radical Ones at the same time.
- Sometimes, when you hit Formula 7 with Radical One on 7rd checkpoint, Formula 7 starts to drive backwards like drunk to the 8th checkpoint.
thumb|250px|left
| List of Stages in Need for Madness |
|---|
| The Introductory Stage · Contrary To Popular Belief · Do The Snake Dance · Grapefruit Power · He Is Coming For You Next · Paninaro, Caninaro, Let's Fly! · When In Danger, Just Chill Out · The Fast & The Furious + The Radical · The Beach Arcade Dream · Confusion In An Illusion · The Mad Party
Bold: Stages also appear in the game's Sequel |